 For my first coffee break
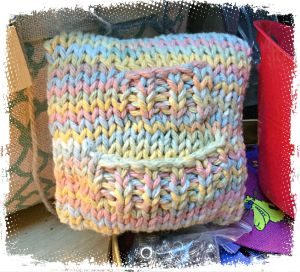
blog pattern, this easy to knit “Tooth Fairy” pillow, is the perfect creation not only to give as a keepsake gift but to practice a couple of easy to learn knitting techniques. The pillow has two pockets a smaller top pocket for the tooth to be placed in and the larger bottom pocket for the fairy to leave a gift.
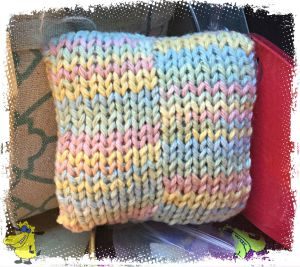
Overall dimensions Approximately 3 1/2” x 3 1/2 ” ( 85 mm x 85mm ). It’s knitted on 4 1/2 mm ( US 7) and the sample shown is knitted in Lily Sugar and Cream “buttercream”.
Materials
Needles – Pair 4 1/2 mm ( US 7) any length.
Darning needle – for sewing seams.
Yarn – Lily Sugar and Cream “buttercream” 49m (53yds).
Stitch Holders.
Stuffing – any clean suitable material, toy filling or you can use wool scraps, filling from old pillows.
Gauge / Tension – 20 x 26 – but don’t get too concerned gauge not critical.
Key.
k-knit , p-purl, st(s)-Stitch(s), rpt-repeat, r-row, co-cast on, rs-right side of work, ws-wrong side of work, st.st.-Stocking St.(k sts. on the rs and p sts. on ws.)
Instructions.
Lge Pocket – co 10 sts, work 10 rows in 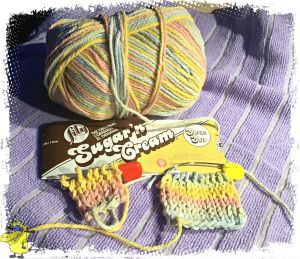 st.st. Place on st holder
Sml Pocket – co 6 sts, work 6 rows in st.st. Place on st holder
Main Pillow. – co 34 sts.
r1 – k8, p1 k16, p1, k8
r2 – p8 k1 p16, k1, p8
rpt r1 and 2 to 2 more times (total 6 rows)
Next ………
r3 – k8, p1,k4, (p1,k1) 5 times, k2, p1, k8
r4 – p8, k1, p3 (k1, p1) 5 times p3,k1,p8
rpt rows 3 and 4 , 1 more time (total 4 rows)
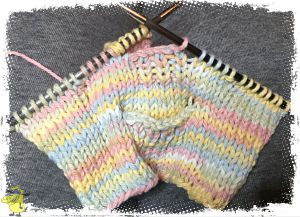 Next (placing pockets… k8, p1, k3, cast off 10 sts, k3, p1, k8 next … p8, k1, p3, (slip sts for large pocket onto needle ready to be worked) p these 10 sts, p3, k1, p8 Next…….Work rows 1 and 2, 1 times(total 2 rows)
r5 – k8, p1,k6, (p1,k1) 3 times, k4, p1, k8
r6 – p8, k1, p5 (k1, p1) 3 times p5, k1,p8
rpt rows 5 and 6 , 1 more time ( total 4 rows)
Next … k8, p1, k5, cast off 6 sts, k5, p1, k8
Next … p8, k1, p5, (slip sts for small pocket onto needle ready to be worked) p these 6 sts, p5, k1, p8
Next repeat row 1 and 2, 2 times (total 4 rows)
Next cast off.
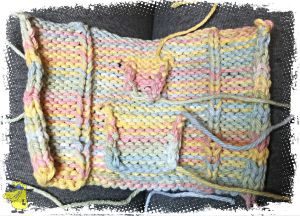 Next. Sew your pocket liners in place. This is good practice for invisible stitching. As you can see on the bottom pocket of this
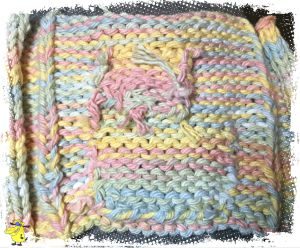
picture, but so long as you can’t see it from the front of the work, don’t worry about the back, see my top pocket looks a bit untidy, no one will ever see it.
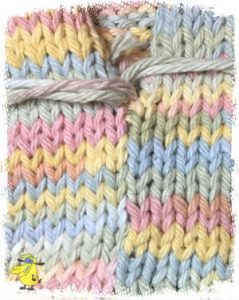 Next down the centre of the back using mattress stitch, this is again good practice for invisible seams.
Next sew the top seems, then half of the bottom seam.
Now pop your stuffing in the pillow, not too much as you want it to be able to move the stuffing around a bit to get your final shape and it needs to be “squiggy”. Now finish that bottom seam.
And Your done……. drink that coffee before it gets cold.
I hope you enjoyed this coffee break project. If you did why not join my mailing list, through the link at the bottom of the page, you will get update of new projects, discount offers and blog updates.
(Please excuse some of the paragraph spacing, I’m still finding my way around wordpress).
Deb
(The “Dizzy Tyke”)


